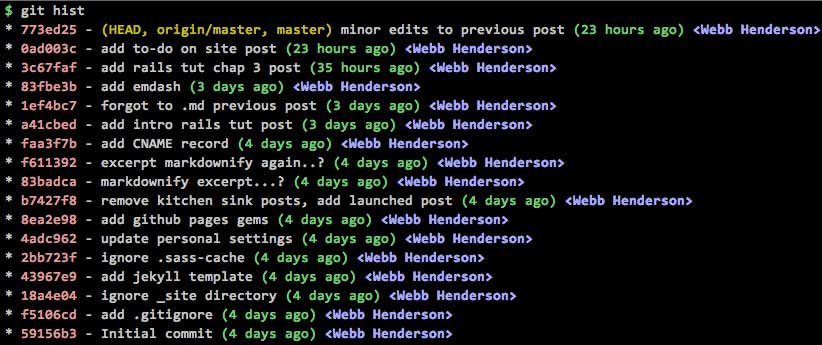
I use an alias in my ~/.gitconfig called git hist1, which looks like this:
hist = log --graph --pretty=format:'%Cred%h%Creset -%C(yellow)%d%Creset %s %Cgreen(%cr) %C(bold blue)<%an>%Creset' --abbrev-commit --date=relativeAnd outputs as (using this site as an example):

It’s insanely helpful but I had no idea how it worked (or what it meant) until just now.
So, here’s a quick look at what I learned:
hist = log: create/start the alias identical togit log--graph: adds graphic on the left side to ‘illustrate’ commits, merges, rebases, etc.--pretty=format:[options]: show certain details (placeholders) about each commit and format them as specified.
Below is a list of those placeholders used here2:
%h= abbreviated hash%d= ref name%s= subject (message in the commit; not decorated)%cr= committer date%an= author name
Colors are then added via %C[color-name]%[text-to-color]%Creset3.
Back to the point — the whole reason I started down this path is because I didn’t know how or why the refs are shown as they are:
(HEAD, origin/master, [other]/master], master)I knew what HEAD meant (sort of). I knew what master meant (for sure). And I think I understood what was happening with origin/master.
Again, after more digging, I’ve found a more concise explanation:
- HEAD : A reference to the last commit in the current checked out branch (via Stack Overflow).
- origin/master : A reference to the remote you cloned the repo from…and where it will push to.
- [other]/master : Additional remotes that you can push to. In the case of Hartl’s rails tutorial, I have one that deploys to heroku via
git push heroku. - master : The branch I’m using and committing to locally.
It’s worth noting that I can use git remote show origin and git remote show heroku to see where they each point.
Whew! This took a while but even if it doesn’t stick I’ll have a place to jump back to! :octocat:
-
Admittedly I stole much of this from the GitImmersion tutorial and then again on coderwall.com. ↩
-
After some digging I found a full list of these options in the git documentation…plus everything else I needed to learn in this post. ↩
-
You can find a full list of
prettyformat options in the git documentation as well. ↩